Is there special surface finish required prior to inspection?
The advantage of Scientific Visual’s scanning technology is that it does not require you to either split a boule or provide a specific surface finish. Instead, the inspection runs on a typical ‘as cut’ or ‘as grown’ surface, notably for HEM boules. The exception is for non-sliced Verneuil-grown carrots covered with a crust – the numerous sub-surface defects inherent in such pieces prevent light from traveling smoothly through them.
What happens if a defect is detected?
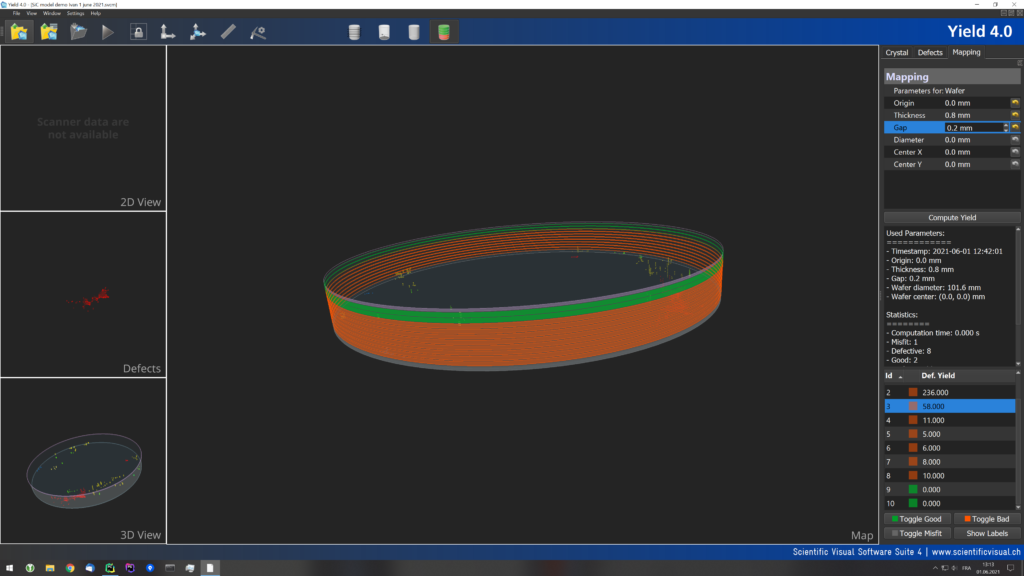
The defect is indicated in the 3D model that the operator can open with the Yield™ software. The operator could print an Inspection Report with a complete list of defects. It could also compute the best wafering or cutting plan, taking these defects into account.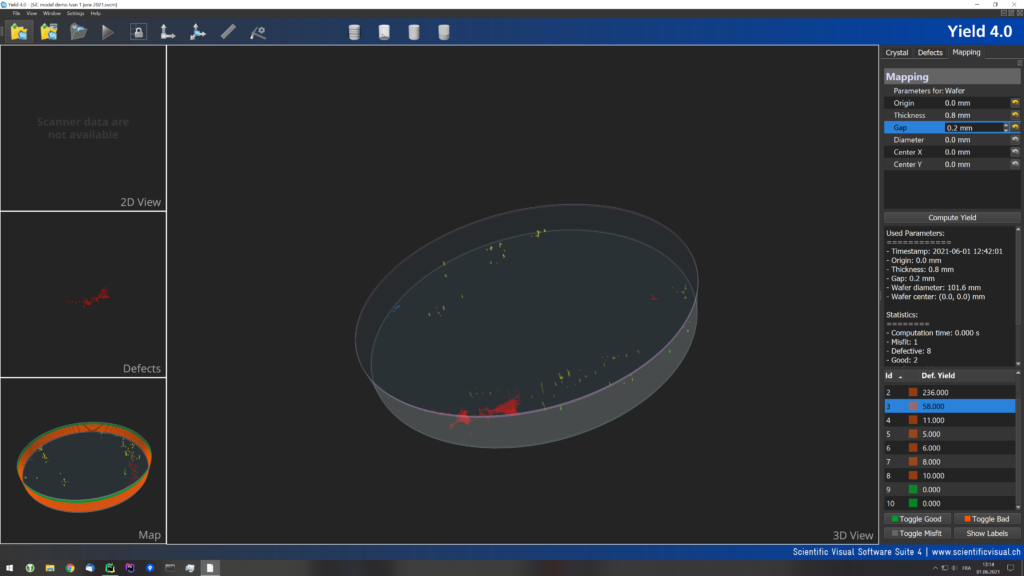
We inspect sapphire with baby oil and the naked eye. To what extent would SapphiroScan™ grading match our visual grading?
Scientific Visual’s automatic grading is objective and significantly superior to a human eye. Depending on the quality of your visual expertise, you could generally expect to match it by between 90-97%.
The delta of 3-10% is due to the subjectivity of human grading. Its value greatly depends on the expert, because accuracy fluctuates with the inspector’s mood, level of fatigue and other individual factors.
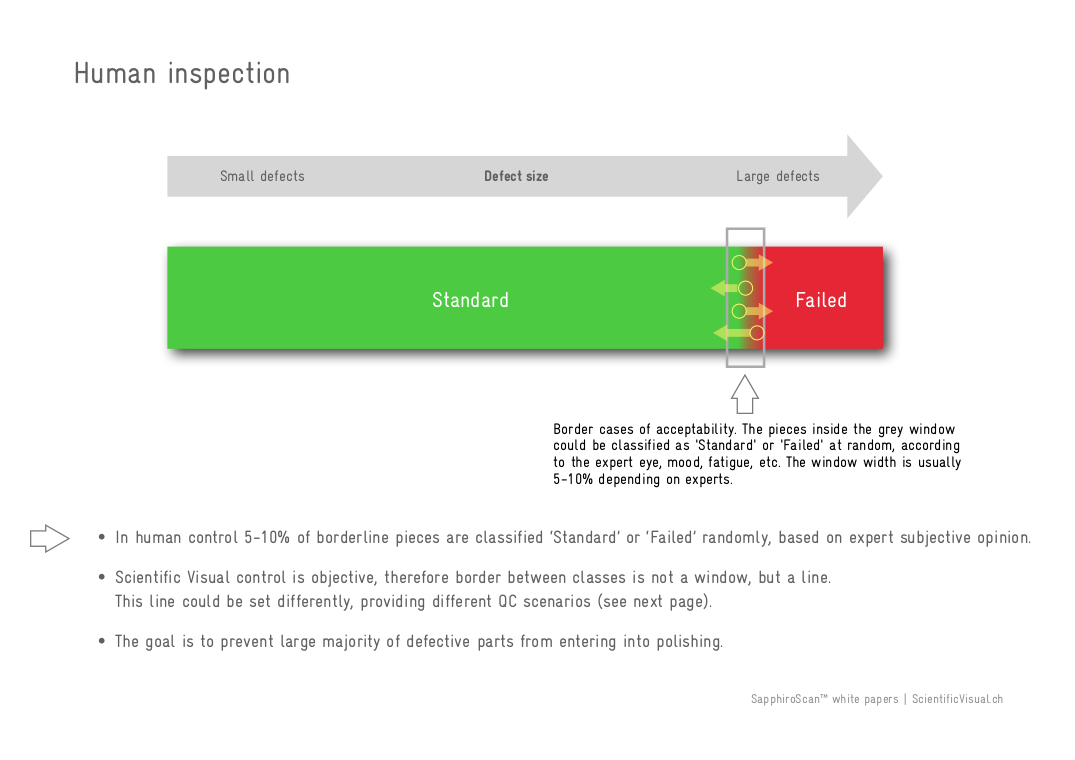
Let’s assume we grade crystals in two categories: Standard and Failed. For human grading, there will be borderline cases that can be allocated to either of the two grades, depending on the personal opinion of the inspector. Such a ‘grey area’ typically covers 5-10% of an inspected batch. In other words, this is the margin of error that can be expected from human inspection.
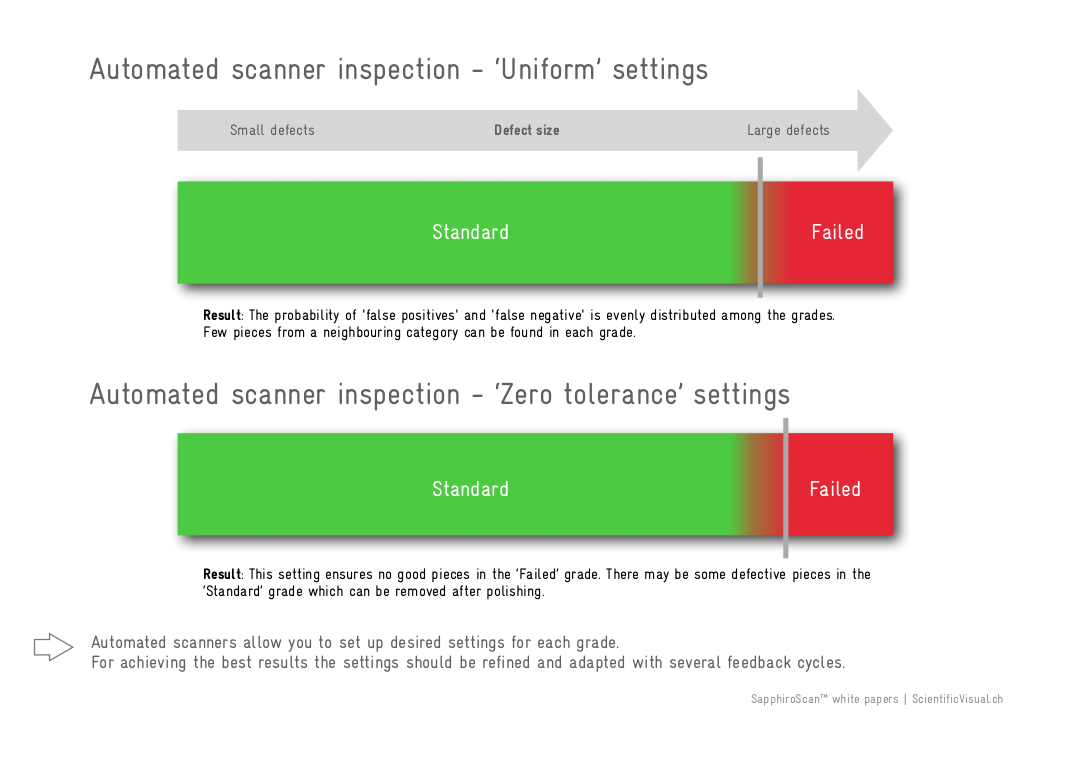
The SapphiroScan™ grading is objective. Therefore the border between the grades is a line, not an area. It explains why a 100% match between human and instrument grading can never be reached.
Operator of SapphiroScan™ operator can position the borderline between Standard and Failed classes differently, creating various inspection scenarios.
Therefore, the match between human and SapphiroScan™ gradings depends on the width of the ‘human border case window’ and the selected SapphiroScan™ settings. This match usually is within 90-97%.
What materials could be inspected?
-
Sapphire
-
Ruby
-
Germinate and aluminate glasses
-
Mineral and Organic Glasses
-
Spinel and spinel-type ceramics
-
YAG
-
Quartz
-
LT/LN
Could you capture a 'smoke'-like defects?
The ‘smoke’ (aka milkiness or microporosity) is a cluster of microbubbles in general in form of lines or a cloud. Individual microbubbles are not distinguishable by a human eye which leads to a cloud-like appearance, typically of a blue shade.
‘Smoke’ defects are captured by SapphiroScan/Scope. Examples: in spinel, in sapphire.
Its detection level could be customized with detection threshold parameters.
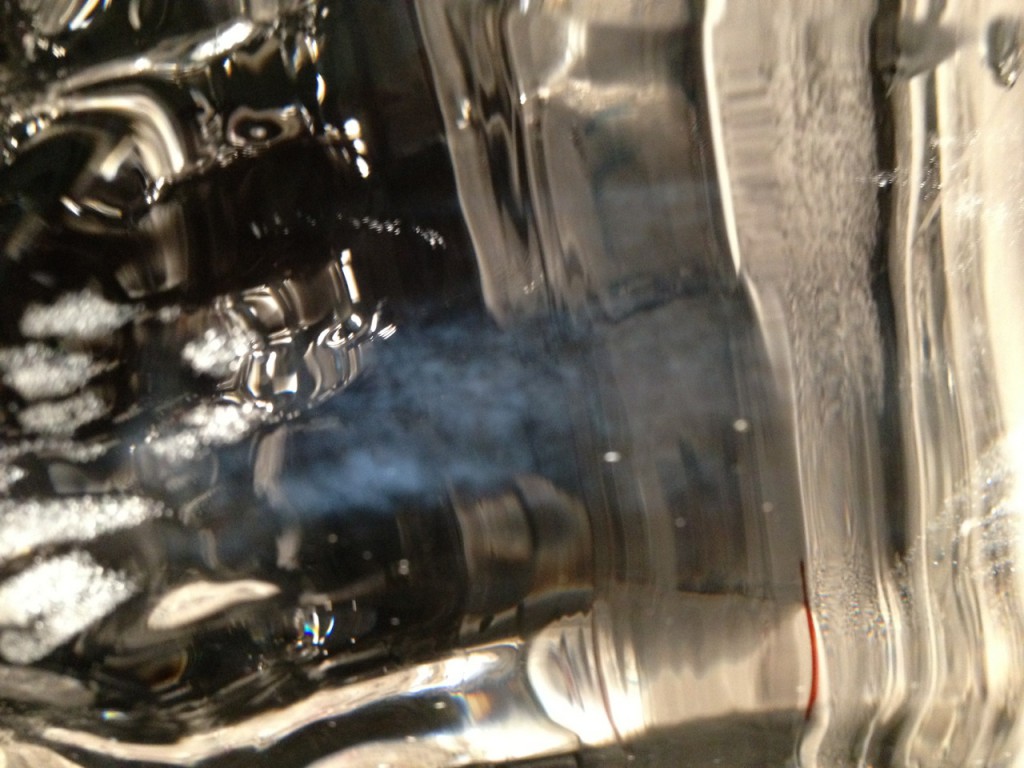 Smoke defect in KY sapphire boule.
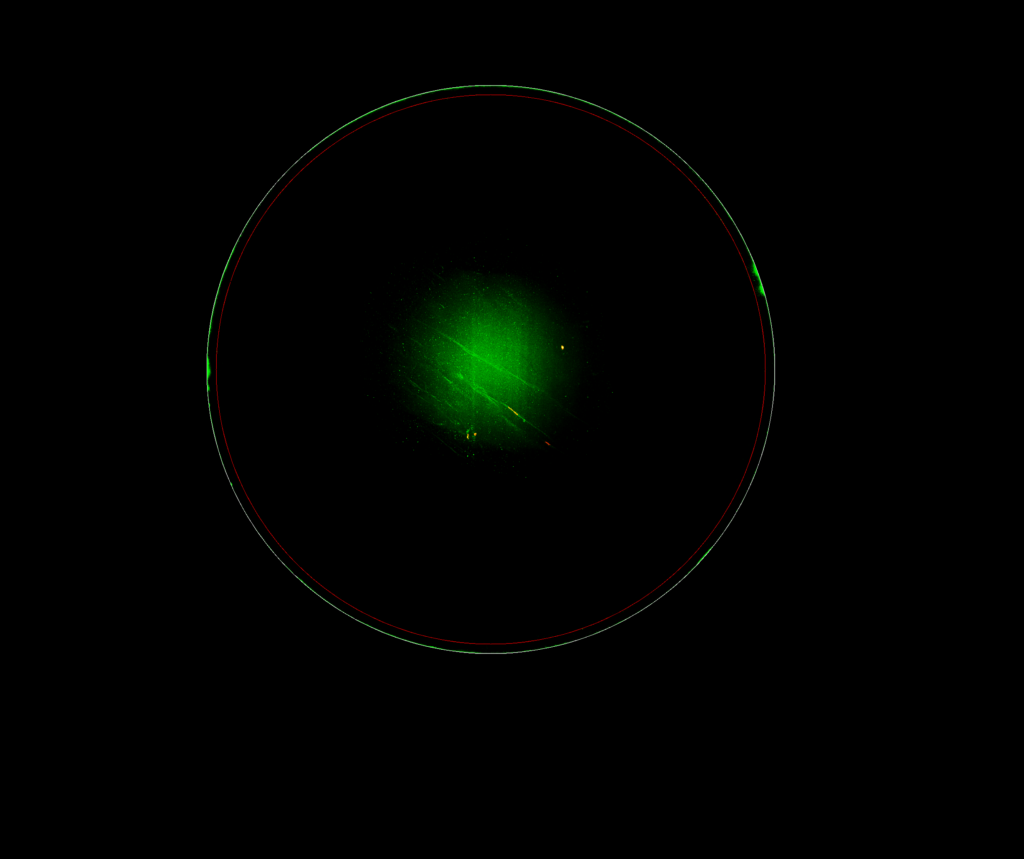 Smoke defect (not the one depicted above) captured by SapphiroScan in a spinel disk ⌀ 30 mm produced by sintering.
Making automatic ‘Standard / Fail’ decisions based on observed defects is challenging. Could you tell more about the algorithms you use, and what to expect in the near future in terms of technology that addresses improvements in automatic quality grading?
Automatic quality grading of a non-polished material is challenging, especially if we remember that most of the crystals so far have been graded by the human eye. Scientific Visual is continuously working to improve its decision-making algorithms.
Generally speaking, a ‘go/no-go’ decision based on the following factors:
- Defect size
- Defect shape and morphology
- Visibility of defect (contrast to the clean material)
- Location of the defect inside the sapphire pre-form
- Number of defects in the pre-form
Each factor has different importance for different customers/applications; therefore acceptance thresholds are customized.
SapphiroScan™ workstations allow complete automatic sorting based on the above testing criteria. In addition, the operator can fine-tune sensitivity to each factor.
SapphiroScope™ workstations currently rely on operator decision-making. In the future, the clarity grading of LED ingots will be more automated with the least possible assistance levels required from the operator. In conjunction with SapphiroScope™ defect detection technology, self-learning algorithms are designed to make the process objective and automatic.
The sapphire community and Scientific Visual are working on establishing industry-wide grades for sapphire quality. It will make automatic clarity grading even more common and allow industry players to communicate about sapphire quality using a universal language. This means that ingot buyers will know exactly what quality level and characteristics they are about to purchase.
I want to buy a sample of your immersion liquids
Scientific Visual does not sell its immersion liquids off-the-shelf, nor does it provide immersion samples for testing. But we are keen to help you, so if you would like to evaluate our technology, please contact us to arrange for a customized test using your material. Then, we will inspect your samples and send you the 3D model of its interior.
What crystal sizes could be inspected?
The inspection technology is not limited by a specific size. Out current equipment is built for 4, 6, and 8-inch ingots up to ~600mm in height.
SapphiroScan™: round disks (polished or non-polished), diameter 24–50 mm, thickness 1.5–5 mm.
SapphiroScope™: cylinders or bricks (polished or non-polished), diameter 1”–12”, height 1–32 cm, or on request.
TotalScan™: any shape, up to 500 mm x 500 mm x 500 mm, 350 kg
What crystal types Scientific Visual inspects ?
Sapphire, ruby, spinels, ZnSe, GaN, LT/LN, tint glass, translucent SiC.
What kind of defects are spotted (morphology, size) ?
Bubbles, structures, micro-cracks, inclusions, dislocations and other crystallisation flaws.
Could your equipment be used for translucent SiC ingots ?
Yes.
Could your equipment be used for translucent SiC wafers ?
No. Our equipment is designed for full crystal or ingot inspection (not wafers) because earlier stage quality control brings more value. Our systems can determine which wafers will be defective in advance, at an ingot stage. The minimum crystal thickness that the scanner can measure is 4mm unpolished.
At what production stage Scientific Visual scanners are used?
The scanners inspect raw crystals before they enter processing, for example, the slicing/wafering stage
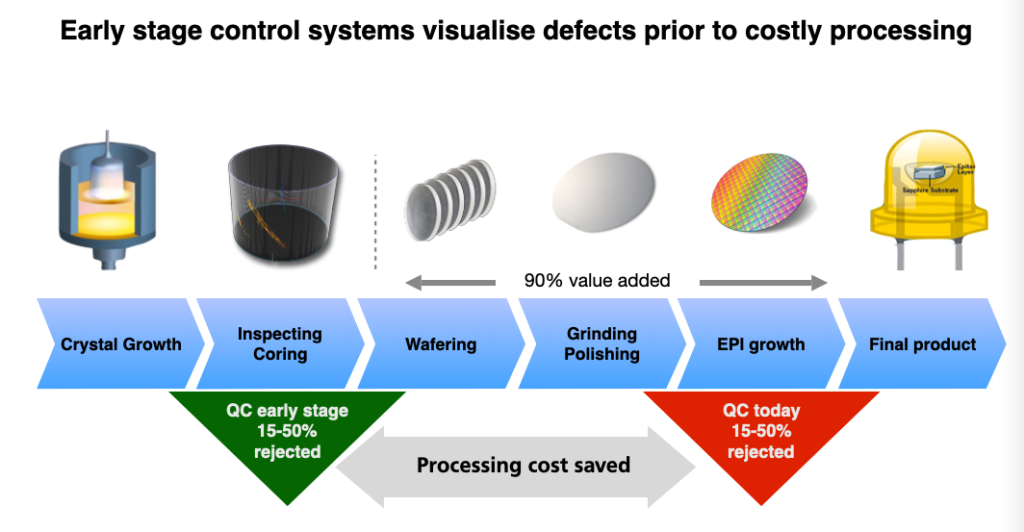
Early stage control system visual defects prior to costing processing

Early stage control system visual defects prior to costing processing

